Deploying Standalone VMware VM using ESXi Wizard
This section describes how to create a Standalone Host VMware machine on VM ESXi Version 8.0.
| ➢ | To create a VMware VM: |
| 1. | Transfer the VMware Virtual Machine installation package that you received from AudioCodes to your PC (see Transferring Files for file transfer instructions). |
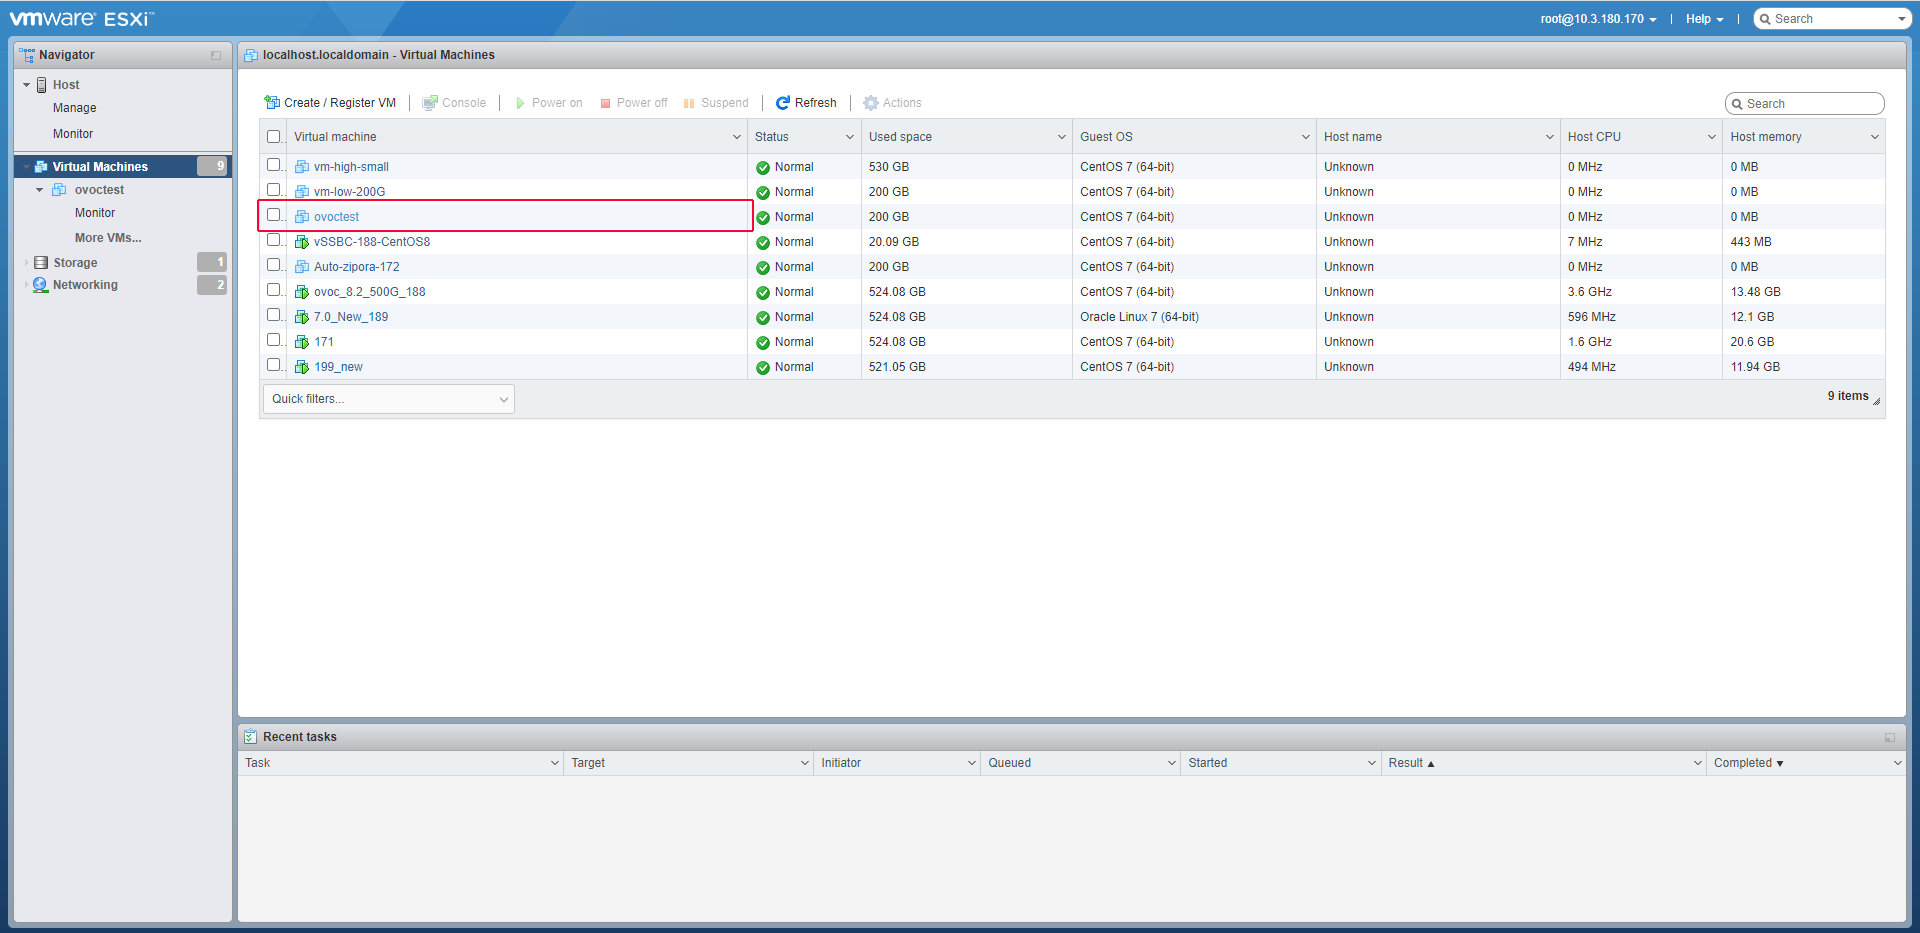
| 2. | Login to the VMware virtual machine on which you wish to install OVOC. |
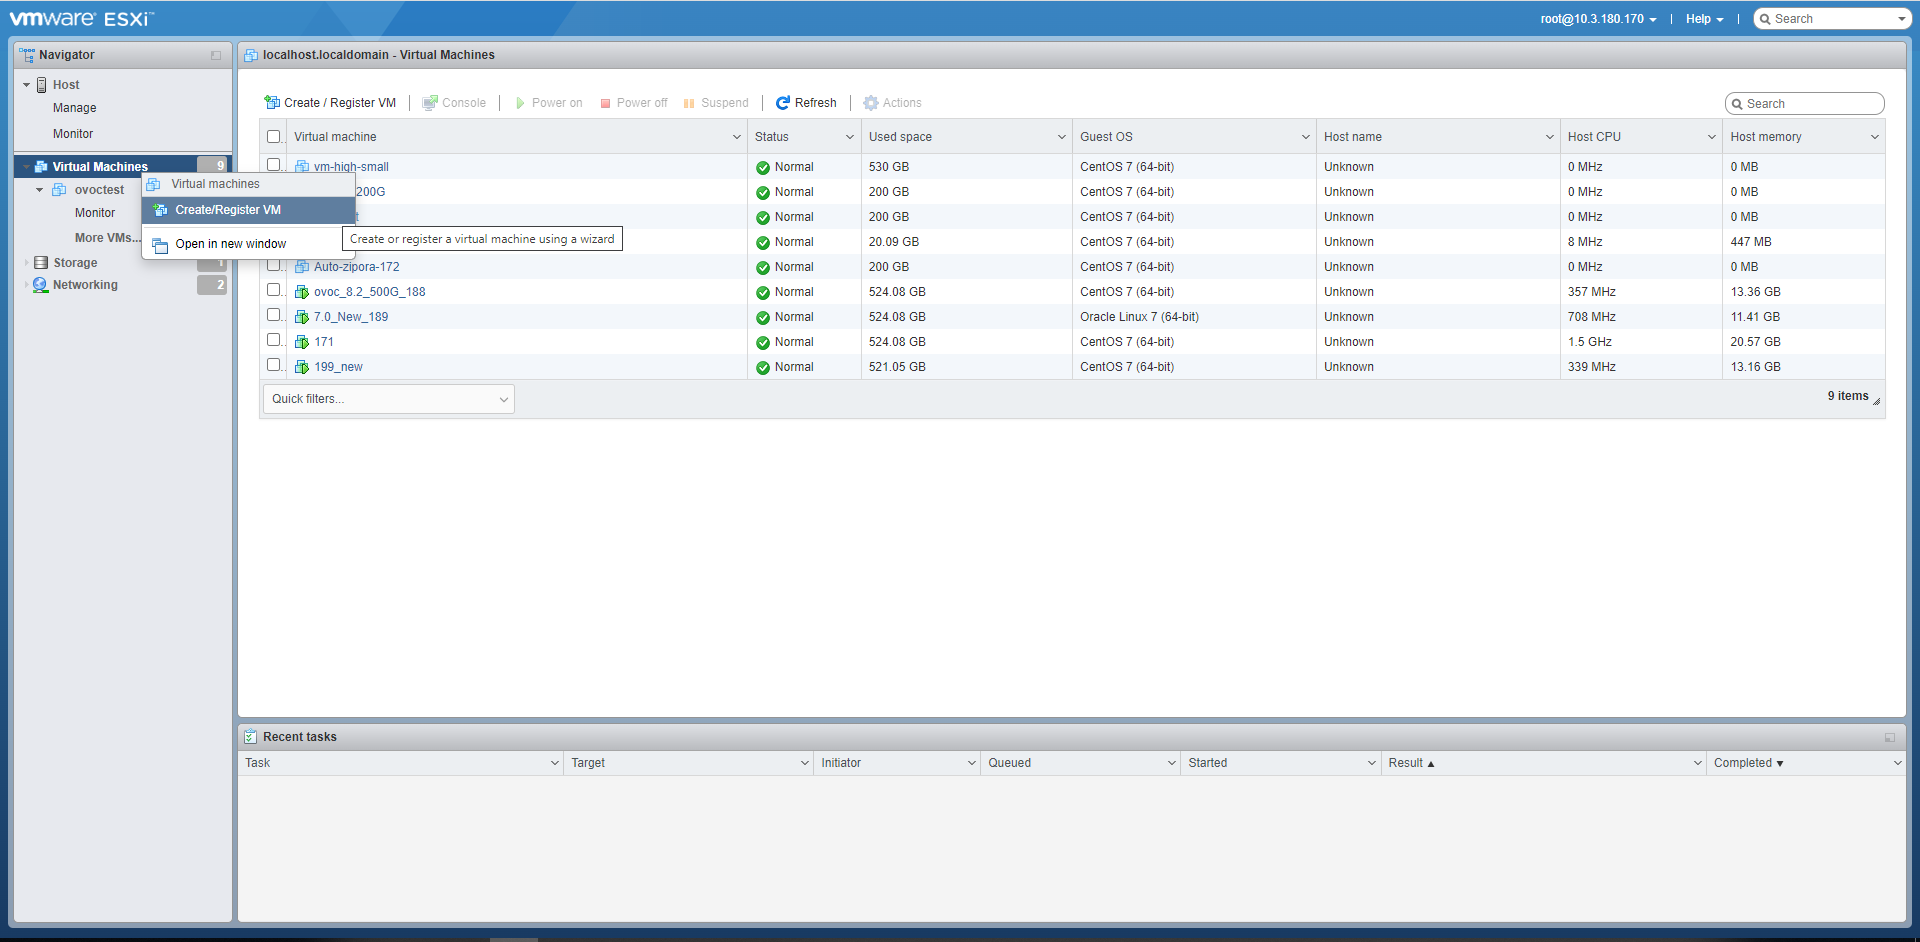
| 3. | In the Navigation pane, select Virtual Machines and the right-click Create/Register VM. |
Create/Register VM
The New virtual machine wizard opens.
Select Creation Type
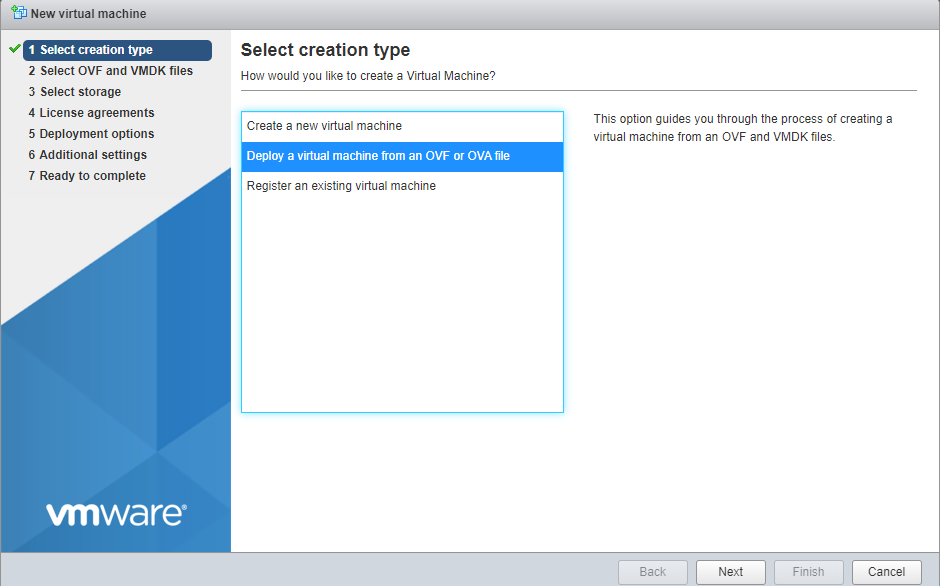
| 4. | Select option Deploy a virtual machine from an OVF or OVA file and then click Next. |
OVF and VMDK Files
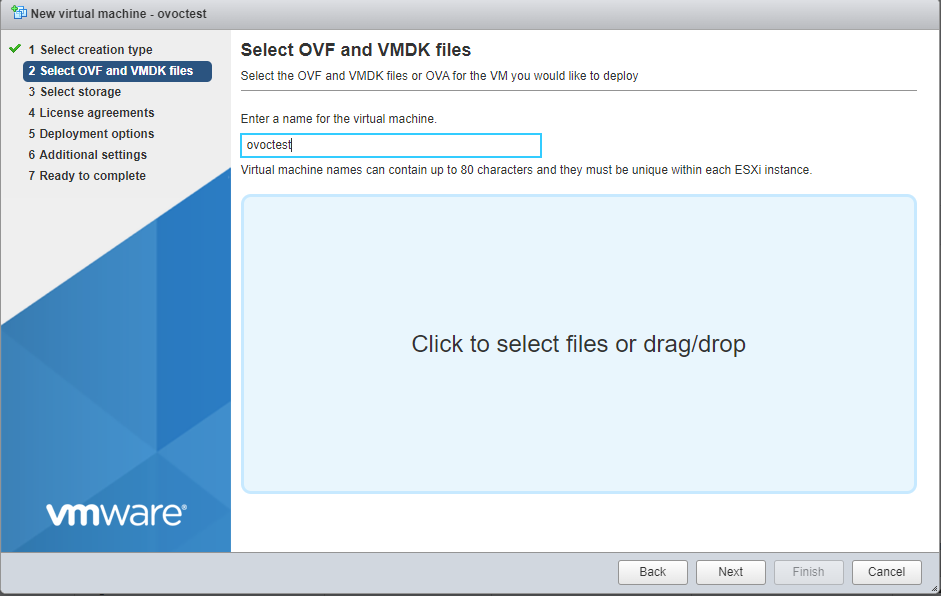
| 5. | Enter the name of the virtual machine. |
Select OVF or OVA
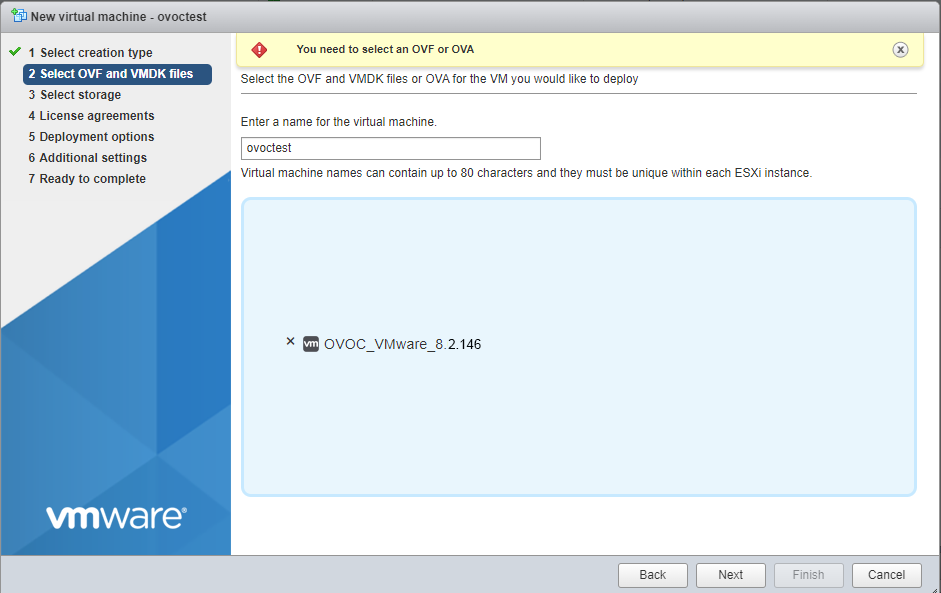
| 6. | Click to browse to the saved location of the OVA file and then click Next. |
Select storage
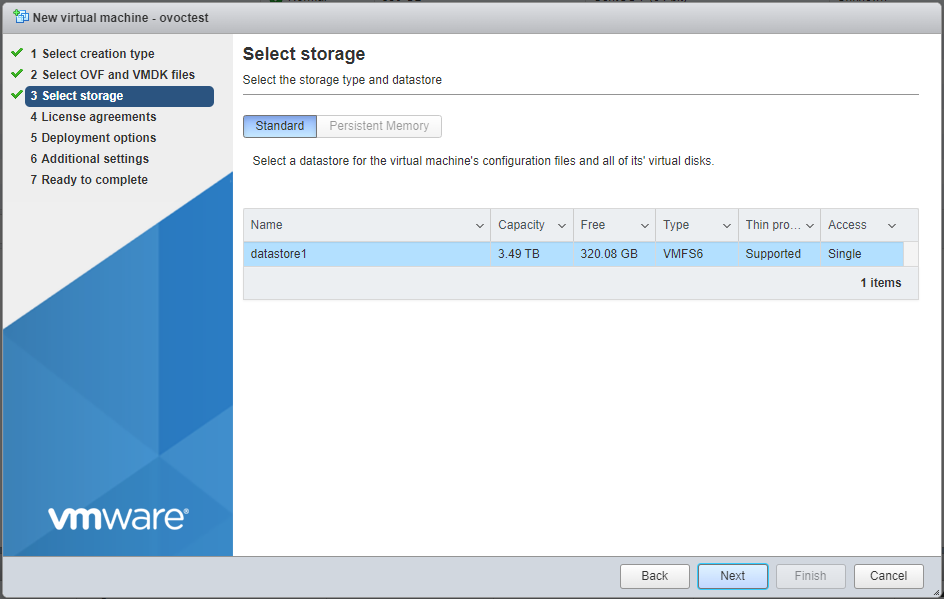
| 7. | Select the relevant Storage Device and then click Next. |
Deployment options
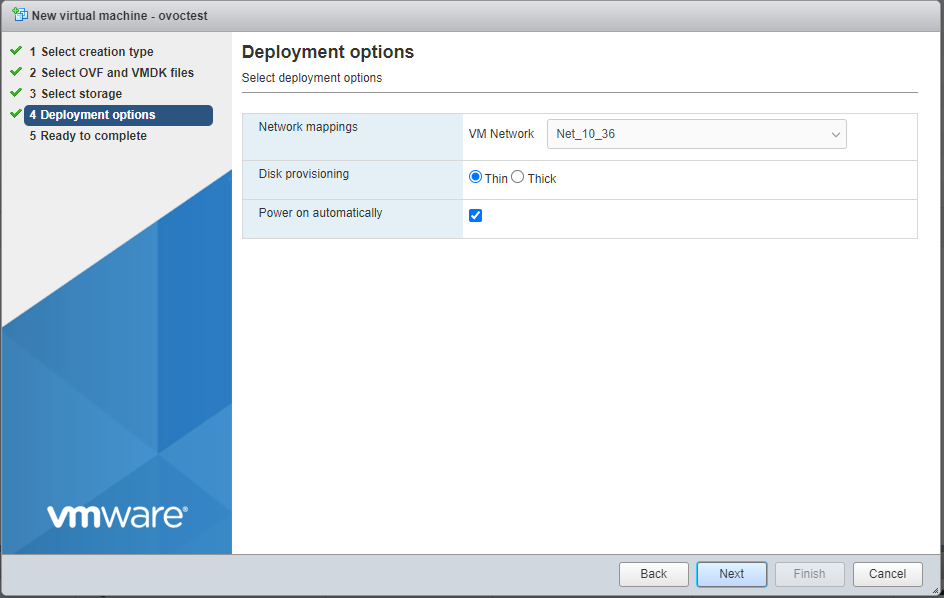
| 8. | Accept default settings for Disk provisioning-thin and Power on automatically-enabled and then click Next. |
The Ready to complete screen is displayed.
Ready to complete
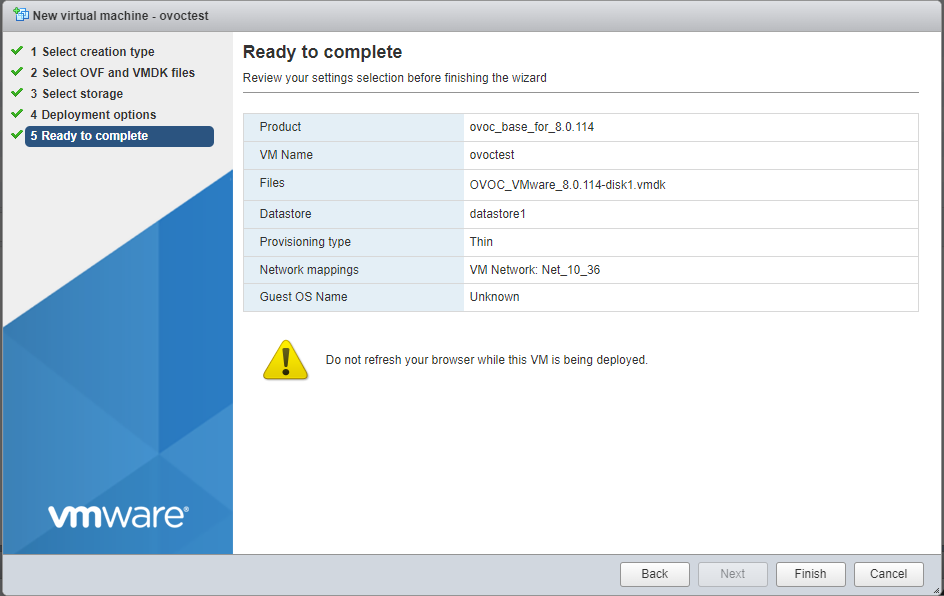
| 9. | Click Finish. |
The new Virtual Machine is displayed.
New Virtual Machine Created